Video Link ⇛
Remote Desktop is a built-in feature of Microsoft's Windows operating system which enables you to control a Windows PC from remote devices using Microsoft's Remote Desktop client app.
All versions of Windows support remote connections, but only professional or Enterprise editions can be configured to accept remote connections. In other words, if you manage a PC with Windows 10 Pro, you may enable Remote Desktop on that device to connect to it remotely. You cannot do so, however, if you manage a Windows 10 Home PC
Enable Remote Desktop on Windows
You have two main options to turn on Remote Desktop functionality on a Windows PC that supports it.
- Use the Microsoft Remote Desktop Assistant tool to set it up.
- Set it up without Microsoft's program.
Microsoft suggests that you enable Remote Desktop access only in trusted networks, for instance, in a home network, and not in public networks or environments with tight access controls.
Microsoft Remote Desktop Assistant
Download the 16 Kilobyte Remote Desktop Assistant from Microsoft's Download site to get started. Run it afterward to install it on the system. Note that it requires an active Internet connection as it downloads the installation files during setup from the Internet.
The assistant is relatively easy to use, provided that it works. I had issues with it throwing "not responding" messages on start. Use the manual setup instructions below if you run into similar problems.
- Accept the License Terms.
- Select "Got it" on the next page.
- Select "Get Started" on the page that explains what the assistant will do when you run it. It will:
- Enable Remote Connections to the PC.
- Keep the PC awake so that it is available for connections.
- Let Remote Desktop through the PC's firewall.
- The assistant displays a "your PC is ready" dialog in the end. It highlights the information that is required to connect to the PC and displays the following options:
- Scan a code to add the PC to your remote device.
- Copy the PC info to the Clipboard.
- Save this connection as a file.
Manual Setup
You don't need to run the Remote Desktop Assistant application to allow remote connections on the Windows PC. Setup is pretty straightforward the manual way as well.
You can either use the keyboard shortcut Windows-Pause to open the System Control Panel applet, click on Advanced System Settings, and then on Remote to start the setup, or use the Start Menu method instead.
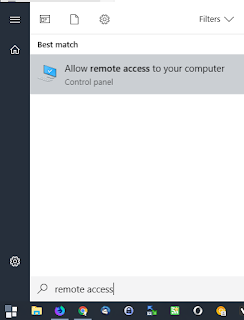
To use the Start Menu, open it, type remote access, and select "Allow remote access to your computer".
Both methods open the Remote tab of the System Properties window. There you find preferences related to Remote Assistance and Remote Desktop.
Remote Desktop is disabled by default. Switch from "don't allow remote connections to this computer" to "Allow remote connections to this computer" to enable Remote Desktop on the Windows machine.
Keep "Allow connections only from computers running Remote Desktop with Network Level Authentication (recommended)" enabled for better security.
The dialog is slightly different on Windows 7 machines. While you do get the same three options, you'd have to pick "Allow connections only from computers running Remote Desktop with Network Level Authentication (more secure)".
Any user who attempts to establish a remote desktop connection to the Windows device needs to authenticate to the network before the connection is permitted.


No comments:
Post a Comment