Your True Business Partner.

Showing posts with label Programming. Show all posts

Saturday, 12 August 2023

Exploring the Fascinating World of AI Technology

August 12, 2023 0


Introduction


In the rapidly evolving landscape of technology, few innovations have captured the imagination of humanity as profoundly as Artificial Intelligence (AI). From science fiction fantasies to real-world applications, AI has proven itself to be a transformative force with the potential to revolutionize industries and enhance our daily lives. In this blog, we'll delve into the captivating realm of AI technology, exploring its fundamental concepts, current applications, and exciting future prospects.


Understanding AI: Unraveling the Basics


At its core, AI refers to the creation of machines or systems that can mimic human intelligence and perform tasks that typically require human cognition. AI systems utilize complex algorithms and vast amounts of data to learn, adapt, and make decisions. There are two primary types of AI:


1. **Narrow or Weak AI**: This type of AI is designed to perform specific tasks, such as virtual assistants like Siri and chatbots.


2. **General or Strong AI**: This is a more advanced form of AI that possesses human-like cognitive abilities and can perform a wide range of tasks requiring intelligence.


*Image Source: Pixabay*


AI Applications: Enhancing Various Industries


AI technology has found its way into a multitude of industries, significantly impacting efficiency, accuracy, and innovation. Here are a few examples:


1. **Healthcare**: AI assists in diagnosing diseases, analyzing medical images, and even predicting patient outcomes, revolutionizing patient care.


2. **Finance**: AI algorithms are employed for fraud detection, stock market predictions, and personalized financial recommendations.


3. **Manufacturing**: AI-powered robots and automation optimize production processes, leading to improved quality and reduced costs.


4. **Retail**: Customer experience is enhanced through personalized recommendations, virtual shopping assistants, and inventory management.


Challenges and Ethical Considerations


While AI technology offers numerous benefits, it also presents challenges and ethical dilemmas. Concerns about job displacement due to automation, biases in AI decision-making, and data privacy have raised important questions about the responsible development and deployment of AI systems.


*Image Source: Unsplash*


The Future of AI: Exciting Prospects


The future of AI holds incredible promise. As technology continues to advance, we can anticipate:


1. **Advanced Automation**: AI-driven automation will redefine industries, streamline processes, and unlock new levels of efficiency.


2. **Human-AI Collaboration**: Collaborative AI systems will augment human abilities, leading to innovative solutions in fields like science, art, and research.


3. **Healthcare Breakthroughs**: AI's potential in drug discovery, disease prediction, and personalized medicine will revolutionize healthcare outcomes.


4. **Autonomous Everything**: Self-driving cars, drones, and smart appliances will become an integral part of our daily lives, reshaping transportation and infrastructure.


Conclusion


The journey into the realm of AI technology is nothing short of remarkable. From its inception as a concept to its current applications across various industries, AI has showcased its potential to transform the world we live in. As we navigate the challenges and opportunities presented by AI, responsible development and ethical considerations will play a crucial role in harnessing its power for the betterment of society. As we step into the future, the possibilities for AI technology are limited only by our imagination.

Monday, 30 September 2019

Back up your email outlook in just 5 minutes

September 30, 2019 0

If you are using email for work, you are most likely using an Exchange or IMAP account. Exchange and IMAP servers automatically archive your email so that you can access it anytime or anywhere. If you have an Exchange account, check with your admin about how to access your archived email.

If you want to back up the message folders locally (in addition to keeping them on the server), you can automatically move or delete older items with AutoArchive or export the items to a .pst file that you can restore later as needed and use by importing.

Today we tell give simple steps for taking backup of your email which are configures in outlook & its takes only just 5 minutes.

Method-1 easy one.


1. Click on file & then click on account setting as shown in the picture:-


2. Now you see account setting and below these you see a acd@yahoo.com.pst patch as shown in the picture


3. Now copy the patch and open it this is your backup file you can move it anywhere as you want.


Method-2


  1. Select File > Open & Export > Import/Export.
  2. Select Export to a file, and then select Next.
  3. Select Outlook Data File (.pst), and select Next.
  4. Select the mail folder you want to back up and select Next.
  5. Choose a location and name for your backup file, and then select Finish.

Thank you for your support.

Feel free to ask me any question about this.


Wednesday, 18 September 2019

How to fix Xampp access forbidden error 403 on apple mac

September 18, 2019 0

Today i tell you how to fix Xampp error "access forbidden error 403"on MAC while opening Phpmyadmin.

Here are simple steps that you followed and your issue resolved.

1.  Mount & Explorer as shown in the picture.


2.  Now open ect then extra as shown in the picture.


3.  Now open httpd-xampp.conf file with text editor and search the code give below as shown in the picture.


Now Just Copy below line and replace with image select line as shown in the above image.


<Directory "/opt/lampp/phpmyadmin">
    AllowOverride AuthConfig Limit
    Order allow,deny
    Allow from all
    Require all granted
</Directory>


After this your issue 100% solved with grantee because i test it with my mac machine. now open phpmyadmin then you see its working.


Feel free to ask my any question about this..

Thank you for your Support.

Sunday, 8 September 2019

Easy Steps for Removing Your Site from Wayback Machine Archive.org

September 08, 2019 0


Today we learned about Wayback Machine.

The Internet Archive, a 501(c)(3) non-profit, is building a digital library of Internet sites and other cultural artifacts in digital form. Like a paper library, we provide free access to researchers, historians, scholars, the print disabled, and the general public
The point is that how to remove our site from archive.org, there are 3 simple steps for removing your site from archive.org, Detail is as under:
  1. Place a piece of code in your robots.txt file.
  2. Creating a DMCA takedown notice.
  3. Email to Achive.org asking for permanent removal of site.

1. Place a piece of code in your robots.txt file.


The code is given below
User-agent: ia_archiver
Disallow: /

If your domain have already this file then you need to add this code into it otherwise just create new one and save it as robots.txt and pate the code then upload to domain directory files.

2. Creating a DMCA takedown notice.


    Now You will need to create a DMCA notice that you can paste into the email you will be sending to Archive.org.
    To create a formal DMCA notice for removing of your website follow the template which link is given below:


    Then pate in Email as mention in step three

     3. Email to Achive.org asking for permanent removal of site.


    After this now you need to send an email to info@archive.org and ask them to remove your site as your required Email format is given below:
    Email subject:
    Formal Request To Remove Website From Internet Archive Wayback Machine
    Then start Email as below:
     “Hi, my name is [Your Name] owner of [The Domain You Are Asking Them To Exclude]. I’m officially requesting immediate removal of the [Your Domain] site/domain from web.archive.org and the Internet Archive Wayback Machine.
    We have placed the User-agent: ia_archiver Disallow: / code in our robots.txt file which is not being followed. The Copyright Notice on this site can be found here – [Link To Your Copyright Notice]”
    Here pate your DCMA takedown Notice as you copied from template:

    “Here is my formal DMCA Takedown Notice:”
    “PASTE IN YOUR TAKEDOWN NOTICE YOU GENERATED FROM TEMPLATE”

    Regards,
    ”Your Name”

    When email completed then send it to info@archive.org
    Once all steps finished then you need to wait up to 48-72 hours and then check site form archive.org if not removed then send Email to archive.org for removing for your site.

    Thank you for your Support.

    Friday, 19 April 2019

    Task Scheduler Auto Copy file from one location to another | Bat File

    April 19, 2019 0
    1. Create Text file.
    2. Copy the code as shown in video.
    3. Save as .bat file.
    4. Create Schedule task in administrator tool.
    5. Locate .bet file as a program file.
    6. Finished the task now its takes back after 24 hours to your destination location.
    7. Video Link is Here......


    Code:


    @echo offset source="D:\BackUp"set target="\\192.168.1.2\Backup"
    FOR /F "delims=" %%I IN ('DIR %source%\*.zip /A:-D /O:-D /B') DO COPY %source%\"%%I" %target% & echo %%I & GOTO :END:END


    then save as .bat file and run the file through task manager.

    About the Task Scheduler?

    The Task Scheduler service allows you to perform automated tasks on a chosen computer. With this service, you can schedule any program to run at a convenient time for you or when a specific event occurs. The Task Scheduler monitors the time or event criteria that you choose and then executes the task when those criteria are met.

    Where Task Scheduler is installed

    The Task Scheduler is automatically installed with several Microsoft operating systems.
    Task Scheduler 1.0 is installed with the Windows Server 2003, Windows XP, and Windows 2000 operating systems.
    Task Scheduler 2.0 is installed with Windows Vista and Windows Server 2008.
    The Task Scheduler 2.0 API should be used in developing applications that use the Task Scheduler service on Windows Vista. For more information, see Task Scheduler Reference.
    Task Scheduler is started each time the operating system is started. It can be run either through the Task Scheduler graphical user interface (GUI) or through the Task Scheduler API described in this SDK.

    Task 

    A task is the scheduled work that the Task Scheduler service performs. A task is composed of different components, but a task must contain a trigger that the Task Scheduler uses to start the task and an action that describes what work the Task Scheduler will perform.

    Task Actions

    The work items performed by a task are called actions. A task can have a single action or a maximum of 32 actions. Be aware that when multiple actions are specified, they are executed sequentially.

    Types of Actions

    The following table of actions describes the type of work or actions that can be accomplished by a task.
    Type of Action
    Description
    ComHandler Action
    This action fires a COM handler.
    Exec Action
    This action executes a command-line operation such as starting Notepad.
    E-mail Action
    This action sends an email when a task is triggered.
    Show Message Action
    This action shows a message box with a specified message and title.


    Specifying Actions

    The actions of a task are specified when the task is defined and stored in a collection of actions used by the Task Scheduler service. The following table lists links to reference topics for the APIs and XML elements that are associated with actions.

    Task Triggers

    A trigger is a set of criteria that, when met, starts the execution of a task. Task Scheduler provides both time-based and event-based triggers that can start a task in several different ways. A given task can be started by one or more triggers. A task can have a maximum of 48 triggers.
    Time-based Triggers

    Time-based triggers start tasks at specified times. This includes starting the task once at a specific time or starting the task multiple times on a daily, weekly, monthly, or monthly day-of-week schedule.

    Event-based Triggers

    Event-based triggers start a task in response to certain system events. For example, event-based triggers can be set to start a task when the system starts up, when a user logs on to the local computer, or when the system becomes idle.

    Multiple Triggers

    Each task can be started by one or more triggers, allowing the task to be started in any number of ways. However, multiple triggers are implemented differently in Task Scheduler 1.0 and Task Scheduler 2.0.
    In Task Scheduler 2.0, each trigger is defined by a separate trigger API that is associated with the task through the trigger collection.
    In Task Scheduler 1.0, multiple triggers can be thought of as a schedule, a set of times at which the task starts. In this case, the schedule is the set of times (specified by the union of all of the triggers associated with the work item) at which a work item will execute.


    Thank you for support,
    For more help please Contact US:
    Your True Business Partner
    Be Happy Always...

    Thursday, 12 July 2018

    WINDOWS SERVER 2012 R2, HOW TO EXTEND IT

    July 12, 2018 0
    WINDOWS SERVER 2012 R2, HOW TO EXTEND IT
    After Window Server evaluation period has expired , you will found out unexpected behavior for your machine like unexpected Shutdown / Restart every one hour approximately !

    In this hint, I will elaborate How to Extend Windows Server Evaluation Period by following the bit mentioned steps below:
    Steps:
    • Open Command Prompt as Administrator.
    run cmd as administrator
    • Reset the licensing status of machine by typing the following command
      • slmgr.vbs /rearm“.
    rearm Windows Evaluation Period
    • Restart the server.
    • The Windows Evaluation Period should now be extended to additional 180 days.
    • After Server restart , wait a moment and you will find the license has been extended successfully.
    Extend Windows Server 2012 Evaluation Period
    Regarding Windows Server 2008
    • Follow the above-mentioned steps with the following changes.
      • The command will be slmgr.vbs -rearm instead of slmgr.vbs /rearm.
      • The command will extend windows evaluation period to additional 60 days,  that can be used again for three times.
    Enjoy ðŸ™‚

    Friday, 11 May 2018

    How to activate windows after the activation period expires

    May 11, 2018 0

    Step 1: Open regedit in administrator mode
    In the start menu, go to accessories, and then right click on the command prompt. select "Run as Administrator" accept the user access control warning and then type regedit into the command line and press the enter key.

    Step 2: Reset the mediabootinstall key
    Navigate to HKLM/Software/Microsoft/Windows/CurrentVersion/setup/OOBE/mediabootinstall and Change it's value to 0 (zero)

    Step 3: Reset the activation grace period
    In the command prompt that you still have open,
    type "slmgr -rearm" and press the enter key. (you can reset the activation period up to 4 times.)

    After slmgr has shown you the dialog stating that the rearm was successful, reboot the computer.

    Step 4: Activate windows
    Right click on computer and select properties, In the computer properties scroll to the bottom and click on "Change product key". Enter the activation key that is on your certificate of authenticity and click next. If activation accepts the key, you are done.

    Step 5: If activation was not successful,
    Continue on with the activation dialog and complete the activation over the phone. You can also double check your activation key as many of the digits are difficult to tell apart. I take a picture of the key with my phone and zoom it in to tell a B from an 8 and a G from a 6.

    Tuesday, 8 May 2018

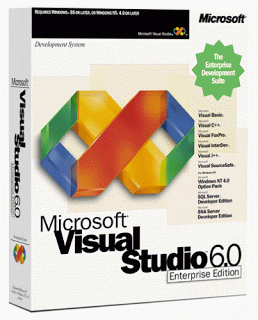
    Install Visual Basic 6 (VB6) on Windows 7 / Windows 8

    May 08, 2018 0

    You may be wondering, Why install Visual Basic 6 on the new operating systems such as windows 7 or Windows 8.
    Well, VB6 is the best tool for learning GUI programming in Windows (according to my teachers in college..!!). But they never tell how to install them on newer operating operating systems. So i figured it out myself.
    This has been successfully tested on my Windows 8 64-bit, so it should probably work with Windows 7 too.
    So here are the steps which I followed
    1. Create a zero-byte file in C:\Windows named MSJAVA.DLL. The reason for this is that the setup will look for this file and if it doesn’t find it, it will force for installation of very old version of Java (which wont install on Windows 8) and will force reboot too. By creating a zero-byte file, the Java installation is bypassed, and no reboot is required.
      For those who are wondering how to create a zero-byte file here is a simple process.
      • Type cmd in Start Menu -> Right click on cmd.exe -> select “Run as administrator” and type in the foll command
        copy nul C:\Windows\msjava.dll
    2. Now insert your Visual Studio 6 CD (or extract the given file to a folder on Desktop)
    3. Exit from Autorun (In case of CD)
    4. Browse to the root folder of CD (or the extracted folder on Desktop)
    5. Right Click “SETUP.EXE” -> Properties -> Compatibility Tab
    6. Now Check “Run this program in compatibility mode” and Select Windows XP( Service Pack 3)
    7. Also Check “Run this program as Administrator” and Click OK
    8. Now open SETUP.EXE. UAC will prompt for confirmation. Select Yes
    9. Now some Program Compatibility Assistant warnings might appear. Select Run Program There
    10. Click Next -> Click “I accept agreement”, then Next -> Enter name and company information, click Next
    11. Now Select “Custom Setup” (IMPORTANT). Click Next
    12. Click Continue, then OK
    13. Now Setup Will Wait and process some information. It might also go to “Not responding” State and Windows might Prompt to close the Process. DO NOT close the process.(IMPORTANT)  Select “Wait for the program to respond”.
      Wait time varies, I had to wait for 30-45 mins on “Not Responding” State. You might need to wait more…or less if you are lucky
    14. Now finally the options list appears
    15. Click on “Select All”. All options should be checked. Click Continue, setup will continue.
    16. Now Setup might again Hang on “Updating System”. Wait, DO NOT close the process. Again the wait time might be from few mins to an hour..!!
    17. Finally, a successful completion dialog will appear, at which click OK. At this point, Visual Basic 6 is installed. Some people might also get some error, but Visual Basic 6 will be installed anyways.
    18. Access it from Start Menu
    Update: Some of my friends mentioned about he sluggishness of VB6 on Windows 8. For example the resizing of objects. Here is a quick fix
    1. Using Windows Explorer, browse the location where you installed VB6. By default, the path is:
      C:\Program Files (x86)\Microsoft Visual Studio\VB98
    2. Right click the VB6.exe program file, and select properties from the context menu.
    3. Click on compatibility tab
    4. Check the foll checkboxes:
      For Windows 7:
      • Run this program in compatibility mode for Windows XP (Service Pack 3)
      • Disable Visual Themes
      • Disable Desktop Composition
      • Disable display scaling on high DPI settings
      For Windows 8
      • Run this program in compatibility mode for Windows XP (Service Pack 3)
      • Reduced Color Mode (16-Bit Color)
      • Disable display scaling on high DPI settings
    5. After saving open up VB6, It should work normally


    For More Detail Contact US: vsitexperts@gmail.com

    5 Tools To Permanently Delete Sensitive Data From Your Hard Drive [Windows]

    May 08, 2018 0

    Low Level Formatting

    The kind of formatting most of us do is known as high level formatting, and whether you perform a quick format or not, your data won’t be deleted. What high level formatting does is set up the file system from scratch and in the process the information where files were stored is removed.
    Low level formatting on the other hand re-initializes the disk and resets the values of each and every magnetic domain, which represents one bit, to zero. We have thoroughly covered formatting on MakeUseOf and if you would like to look into the details, I recommend the following articles:

    Darik’s Boot And Nuke

    Low level formatting isn’t 100% efficient and may leave traces of data. If you wish to wipe an entire disk before you dispose of it, I recommend Darik’s Boot and Nuke, a boot disk that will automatically and completely delete data on any detected hard disk.
    If you are already using CCleaner, you should know that it contains a Drive Wiper.
    Open CCleaner and go to > Tools > Drive Wiper. You can wipe only free space or the entire drive, and you can choose up to 35 passes, meaning data will be overwritten with random strings of binary code 35 times. This very complex overwrite should make it impossible for anyone to restore the data originally saved in this space. When you’re happy with your settings click > Wipe and wait patiently.

    SDelete

    Microsoft made it very easy to not delete files thoroughly. To make up for this potential security hole, they released a free command line utility called SDelete. This doesn’t make removing data any more convenient, but it can be considered a step in the right direction. Unfortunately it is a very small step, since Microsoft fails to provide instructions on how to properly open SDelete in the first place. Well, that’s what MakeUseOf is here for.
    1. Download the ZIP archive containing the tool and extract the folder.
    2. Click > [WINDOWS] + [R] to open the Run window.
    3. Type > cmd and click > OK to open the command prompt.
    4. Then move the > SDelete.exe file to the directory > C:\User\yourusername
    5. Now type a command in the command prompt, for example > sdelete -z to cleanse free space on your C: partition. A full list of commands is shown in the screenshot below.
    Eraser is a freeware and open source security tool to completely remove data from your hard drive. It can overwrite data several times using randomized patterns of binary code. It essentially is a file shredder.
    Eraser is more convenient than CCleaner’s Drive Wiper because it can delete and shred single files, rather than just wiping all free space on a drive, and it is integrated with Windows Explorer (right-click menu). Moreover, Eraser provides you with a host of advanced settings, for example different file and space erasure methods, the option to replace erased files with other files to allow plausible ‘deniability’, and schedule erasure of files, folders, recycle bin, or unused disk space.
    The tool is also available as a portable app called EraserDrop Portable. It is part of the PortableApps suite.
    We have covered Eraser in its (and MakeUseOf’s) very beginnings four years ago. Both have come a long way since. Feel free to check out the article here – How To securely Retrieve and Delete PC Files

    Other Tools

    There are several more file shredders that can securely delete files from your hard drive. Some of them were covered in the article 4 File Shredders to Make Deleted Data Unrecoverable. If you need to secure sensitive data without deleting it, you should seriously look into encryption and the article Encrypt Or Completely Wipe Files With the Axcrypt Encryption Utility [Windows] provides an excellent start.