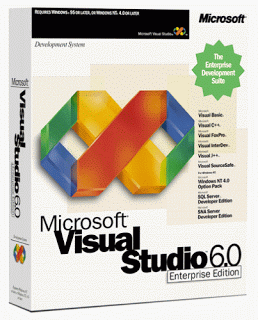
You may be wondering, Why install Visual Basic 6 on the new operating systems such as windows 7 or Windows 8.
Well, VB6 is the best tool for learning GUI programming in Windows (according to my teachers in college..!!). But they never tell how to install them on newer operating operating systems. So i figured it out myself.
This has been successfully tested on my Windows 8 64-bit, so it should probably work with Windows 7 too.
So here are the steps which I followed
- Create a zero-byte file in C:\Windows named MSJAVA.DLL. The reason for this is that the setup will look for this file and if it doesn’t find it, it will force for installation of very old version of Java (which wont install on Windows 8) and will force reboot too. By creating a zero-byte file, the Java installation is bypassed, and no reboot is required.
For those who are wondering how to create a zero-byte file here is a simple process.- Type cmd in Start Menu -> Right click on cmd.exe -> select “Run as administrator” and type in the foll commandcopy nul C:\Windows\msjava.dll
- Type cmd in Start Menu -> Right click on cmd.exe -> select “Run as administrator” and type in the foll command
- Now insert your Visual Studio 6 CD (or extract the given file to a folder on Desktop)
- Exit from Autorun (In case of CD)
- Browse to the root folder of CD (or the extracted folder on Desktop)
- Right Click “SETUP.EXE” -> Properties -> Compatibility Tab
- Now Check “Run this program in compatibility mode” and Select Windows XP( Service Pack 3)
- Also Check “Run this program as Administrator” and Click OK
- Now open SETUP.EXE. UAC will prompt for confirmation. Select Yes
- Now some Program Compatibility Assistant warnings might appear. Select Run Program There
- Click Next -> Click “I accept agreement”, then Next -> Enter name and company information, click Next
- Now Select “Custom Setup” (IMPORTANT). Click Next
- Click Continue, then OK
- Now Setup Will Wait and process some information. It might also go to “Not responding” State and Windows might Prompt to close the Process. DO NOT close the process.(IMPORTANT) Select “Wait for the program to respond”.
Wait time varies, I had to wait for 30-45 mins on “Not Responding” State. You might need to wait more…or less if you are lucky - Now finally the options list appears
- Click on “Select All”. All options should be checked. Click Continue, setup will continue.
- Now Setup might again Hang on “Updating System”. Wait, DO NOT close the process. Again the wait time might be from few mins to an hour..!!
- Finally, a successful completion dialog will appear, at which click OK. At this point, Visual Basic 6 is installed. Some people might also get some error, but Visual Basic 6 will be installed anyways.
- Access it from Start Menu
Update: Some of my friends mentioned about he sluggishness of VB6 on Windows 8. For example the resizing of objects. Here is a quick fix
- Using Windows Explorer, browse the location where you installed VB6. By default, the path is:C:\Program Files (x86)\Microsoft Visual Studio\VB98
- Right click the VB6.exe program file, and select properties from the context menu.
- Click on compatibility tab
- Check the foll checkboxes:
For Windows 7:- Run this program in compatibility mode for Windows XP (Service Pack 3)
- Disable Visual Themes
- Disable Desktop Composition
- Disable display scaling on high DPI settings
For Windows 8- Run this program in compatibility mode for Windows XP (Service Pack 3)
- Reduced Color Mode (16-Bit Color)
- Disable display scaling on high DPI settings
- After saving open up VB6, It should work normally
For More Detail Contact US: vsitexperts@gmail.com


No comments:
Post a Comment